Close
Encounters: The First Naval Battle of Guadalcanal
12th/13th November, 1942
Prologue
Despite
the tactical victory Japan scored in the Battle of Santa Cruz, it had not
by any means secured a major advantage over the enemy. Part of the reason
for this was the failure to time efforts to better effect: the 13-14 October
bombardment of Henderson Field, by battleships Kongo and Haruna,
had a devastating effect on the local air units, which lost most of their
fuel and half of their planes, with more damaged. However, by the time
of the Battle of Santa Cruz, little of this damage remained and fighting
spirits were high again.
Then,
at Santa Cruz, the U.S. Navy lost the service of both of its carriers,
with Enterprise damaged and Hornet sunk, but planes from
both carriers found refuge on Guadalcanal. Had the Japanese followed their
success off Santa Cruz with a bombardment of Henderson Field, there very
well might have remained close to no opposition to Japanese reinforcement
runs.
However,
it was not to be: the Japanese did not act quickly, as they so often had
failed to do in the past. They had, however, not yet acknowledged defeat
on Guadalcanal, and created a plan for a major offensive in November. Rear-Admiral
Tanaka Raizo would escort eleven transports carrying some 7,000 men and
tons of ammunition and supplies to Guadalcanal. Support for this operation
would come from the carrier Junyo, to remain off the northern side
of the Solomons, and the major part of the Imperial Navy's fast surface
forces, including the four 30-knot battleships of the Kongo class.
Difficulties
were presented only by Henderson Field as far as the IJN was concerned.
Hornet was known to have sunk; Japanese destroyers had accounted
for her floating hulk. Enterprise was expected to be out of service,
possibly sunk. However, Japan's leaders had had many experiences with Henderson's
air power, and they knew for certain that the American aviators on the
island would not give kind treatment to Japanese forces coming their way.
There was no hope that eleven
slow transports would come down the Slot undetected, and there was no hope
either of an effective defense of the transports with fighter planes.
Accordingly,
the Imperial Navy decided to repeat the October bombardment in two steps:
after a two day offensive by units of the 11th Air Fleet, the battleships
Hiei and Kirishima would smash Henderson with concentrated
gunfire a day before the arrival of Tanaka's convoy; command over the battleships
would be with Rear-Admiral Abe Hiroaki. Then, the day of Tanaka's arrival,
Admiral Mikawa would pulverize the remnants of Henderson Field's air units
with 203mm fire, leaving no opposition to Japanese reinforcement attempts.
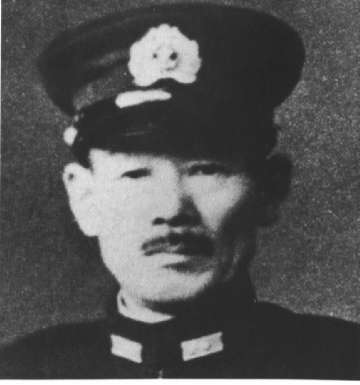
Vice-Admiral Abe Hiroaki,
commanding officer of the Japanese bombardment force.
|
Tanaka's landing, scheduled for 13 November 1942, would bring Japanese
strength to a level high enough to successfully attack enemy forces on
the island, and would provide enough artillery shells and supplies to support
such an offensive. Secondarily, this artillery would be able to hold down
any further aerial reinforcements Henderson Field would get. Thus was the
plan, thus it would be done.
Halsey's Dilemma
Vice-Admiral
Halsey had, after the strategic success of the Battle of Santa Cruz, once
again many problems to solve but few tools to work out a solution.
Enterprise had arrived
at Nouméa, New Caledonia, on 30 October in bad shape: her forward
elevator locked in the upper position, her hull damaged, her air group
somewhat mauled. From the repair ship Vulcan, men were sent aboard
to gain the upper hand on time, which still worked against Halsey. A battalion
of Seabees got to work in an unusual place, and together with Enterprise's
own repair teams, they were in for rushed repairs: Halsey gave them only
twelve days.
The Enterprise
formation was still a powerful force: the fast battleships Washington
and South Dakota, the heavy cruiser Northampton, the light
cruiser San Diego and six destroyers were protecting her.
At Espiritou
Santo, moreover, Halsey retained Admiral Turner's transport units, which
were supposed to conduct another supply run to end on 12 November, consisting
of seven transports carrying the 1st Marine Aviation Engineer Regiment,
the U.S. Army's 182nd Infantry (National Guard) Regiment and supplies to
sustain the forces on the island. Turner had a very potent escort: heavy
cruisers Portland and San Francisco, light cruisers Helena,
Atlanta and Juneau, plus nine destroyers. Turner would move
his forces in two separate moves, first the Engineers on three transports,
with Atlanta and three destroyers as escorts, under command of Rear-Admiral
Norman C. Scott, victor at Cape Esperance. Turner himself would take the
rest of the forces, with his escorts under command of Rear-Admiral Daniel
J. Callaghan, former Chief-of-Staff to Admiral Ghormley. |
Halsey had
an advantage that slowly became common to all U.S. operations in the Pacific:
he had advance knowledge of unusual clarity regarding Japanese plans. When
returning from a visit to Henderson Field, he was met by Captain Miles
Browning, his brilliant, but arrogant and hot-tempered Chief-of-Staff,
and informed about all details of Yamamoto's plan except for an incorrect
estimate of five carriers with the IJN forces. At this point, it became
clear to Halsey that everything was at stake in a crucial moment in which
he was unable to sortie but a third of his forces in time. Enterprise
and her screen, augmented by heavy cruiser Pensacola, departed Nouméa;
but they would not arrive in time to stop the Japanese, for Halsey had
waited too long. Admiral Turner's transports reached Guadalcanal in the
early hours of 12 November, and commenced unloading rapidly.
Last-minute changes
Once
again Admiral Turner sat off Guadalcanal with enemy forces coming down
on him, but this time he knew. Reconnaissance planes had found Abe making
speed down the Slot, and Tanaka slowly coming down behind him. Turner made
a decision of remarkable farsightedness: he chose to withdraw his transports
with weak escort, leaving the whole of five cruisers and eight destroyers
in a position to intercept Admiral Abe. Turner placed this force under
the command of Rear-Admiral Callaghan, instead of Rear-Admiral Scott, on
the basis of the former's two-weeks seniority as Rear-Admiral, but Turner's
decision on that one was probably wrong (-
1 -), although proper according to U.S. Navy regulations. Callaghan
had never commanded forces in combat, and had not had sea-time in the war;
Scott had six months of sea-time under his belt and commanded forces in
a successful battle.
At any
rate, Turner's departure on the evening of 12 November left the Americans
with a respectable force to pit against the advancing Japanese. Callaghan,
for ease of navigation and because of poor tactical doctrine, bad communications,
and general uncertainty regarding his ships' abilities to conduct battle,
aligned his 13 ships in line ahead, four destroyers first, then Atlanta,
San Francisco, Portland, Helena, Juneau, with
another four destroyers making up his rear.
Several criticisms, often
heard though they are, must be made again here: first, Callaghan failed
to put a ship with the new, powerful, SG radar anywhere near the lead,
the first vessel so equipped being Helena -- at eighth position
in line! Next, Callaghan's flag flew at the masthead of an SC-radared ship,
San Francisco, instead of Helena. Third, his most experienced
destroyer leader, Captain Robert G. Tobin in Aaron Ward, was put
in the rear, not the van destroyers, thus depriving Callaghan of much necessary
knowledge of night combat.
The Battle
While
Callaghan formed his line, Rear-Admiral Abe's powerful force steamed down
the slot. However, Abe's voyage, having started on the 12th, stood under
a luckless star from the beginning. Part of the bad luck was of Abe's own
making: he had arrayed his forces in a completely unsuitable manner for
all but the best of weather and ability. Abe's battleships were between
the pincers of an eclipse formed by his eleven destroyers. Five destroyers
made up the van of the formation, in a very rough line abreast, 8,000 meters
ahead of the main body.
Six other
destroyers were dispersed along the sides of the battleships. Then, when
aircraft reported deteriorating weather over Guadalcanal, Abe turned his
force around, heading northwest for a time, about four hours. At about
0040 on the 13th, he came back to his earlier course, and proceeded toward
Guadalcanal. His changes of course, made inside a squall of uncomfortably
long endurance, had thrown his force into complete disarray, leaving his
van behind him, his port side destroyers on his starboard, and a discomfiting
confusion as to his actual dispositions dawned on Abe.
At 0125,
Cape Esperance came into sight, and without positive intelligence of the
presence of the enemy (- 2 -),
Abe ordered the preparations for the shelling of Henderson Field commenced.
His belief in his ships being the only ones in the sound that night stemmed
in part from the idea that a destroyer division, the fourth, would be sweeping
the seas ahead of him -- but as we have seen, these vessels were actually
sweeping behind Abe!
Aboard
Callaghan's ships, notice had been received from Helena regarding
the presence of enemy vessels bearing roughly 315 degrees from Cushing,
the lead destroyer. Callaghan initiated a northward turn, aimed at crossing
Abe's "T", but his maneuver came too late: collision was imminent.
At the moment action was
joined, U.S. dispositions were still in order, Portland having just
initiated her turn. Abe's looked different: destroyers Yudachi and
Harusame led the formation several thousand yards in front of light
cruiser Nagara, in whose wake followed the battlewagons Hiei
and Kirishima. Off the starboard bow of Hiei, the destroyers
Yukikaze, Amatsukaze and Teruzuki were in line ahead
ending off Kirishima's starboard quarter. Off the battleships' port
bows, the destroyers Ikazuchi, Akatsuki and Inazuma
were in echelon left formation. Crossing Abe's "T" from the behind was
Destroyer Squadron 4, with Asagumo, Murasame, and Samidare.
But soon,
confusion was to reign everywhere in the sound. Cushing made contact
with Yudachi and Harusame, broke left to unmask her batteries,
and queried Callaghan to open fire, a request Callaghan ultimatively denied.
At any rate, the American column saw Atlanta veer out of the line
to avoid O'Bannon before her, causing the rest of the ships to follow.
Cushing corrected her turn, now behind the leading Japanese destroyers,
and sighted Nagara. Her moves had put the American formation on
a collision course with the huge Japanese battleships. At 0148, Callaghan
gave the famous order: "Odd ships fire to starboard, even ships fire to
port." (- 3 -)
Callaghan's
refusal to open fire earlier had given Abe the necessary time to change
his bombardment shells to the armor-piercing kind. The melée that
was to follow Abe could not prevent.
His own flagship Hiei
snapped on a searchlight, quickly settling on Atlanta, 1,500 yards
away. The light cruiser snapped at Hiei angrily with her 127mm guns,
to which Hiei replied at 0148. Atlanta split her fire shortly
thereafter between Akatsuki, just identified, and Hiei. In
front of her, Cushing began a losing duel with Nagara and
Yukikaze after releasing six torpedoes at Hiei that missed.
Hiei's reply hit Cushing's engine space, rendering her unfit
for her duel: she could only fire her hand-moved 20mm guns, for power was
lost completely. Her service was over. Laffey, Sterett, and
O'Bannon had remarkably similiar experiences skirmishing with the
battleship and her escorts. All three ships maneuvered desperately to avoid
fire, collisions, and other natural hazards of night-fighting, with more
or less success: Laffey sank as a battered wreck, Sterett
lived as a battered wreck, and O'Bannon survived with slight damage.
San
Francisco and Atlanta following were in for equally bad treatment.
Both traded salvoes with the enemy, but Atlanta, hit severely by
Hiei's 6-inch secondary battery and destroyer salvoes, staggered
out of the line. There, she was hit devastingly by two full salvoes from
San Francisco, not seeing the light cruiser in the confusion. Admiral
Scott died a victim of friendly fire. San Francisco, meanwhile,
steamed into dIsaster. Gliding past Atlanta, she came to parallel
course with Hiei, both flagships training out their guns, but the
Japanese vessel shooting more accurately. After three salvoes, shells shattered
into the ship's upperworks, killing Admiral Callaghan, Captain Young, and
all of the command staffs. The senior surviving bridge officer took the
shaken ship westwards, and out of the action.
Portland,
trailing the flagship, was hit by a torpedo early into the action, but
got to fire with good effect on Hiei. Since her maneuverability
was restricted, however, to a single circle, she could not become an asset
to the rapidly moving battle. Helena too fired to good effect, on
destroyer Akatsuki, then opened up on Amatsukaze, scoring
once, but had to check fire because of San Francisco coming across
her guns. Five shells were all the retaliation of the Japanese. Helena
maneuvered the sea of debris for the rest of the action, but failed to
engage significantly.
It was
now the turn of the after destroyers, Aaron Ward, Barton,
Monssen, and Fletcher. Their commitment was devoted, but
ineffective: Aaron Ward evaded Yudachi after having opened
fire on Hiei, thereby placing her in a rough line abreast from Barton,
originally trailing her. Moments thereafter, torpedoes were witnessed passing
from port, under the destroyer, and into Barton, which immediately
exploded. These torpedoes were courtesy of Amatsukaze, beautifully
handled by Commander Hara Tameichi.
Aaron
Ward continued battle, firing at indistuinguishable sources of searchlights,
getting out of the heavy fire placed on her just before she ground to a
halt. Wittnessing the sinking of Barton was Monssen, too, in the
destroyer's wake, at almost the same time firing torpedoes toward the Hiei,
another five toward a destroyer, and fiercely striking out with all-caliber
fire.
There was no time to determine
identities, and not long after the torpedo salvos had splashed into the
sea, almost 40 shells turned Monssen into a drifting derelict. Fletcher
miraculously survived the entire battle without a scratch in her paint;
not that she did not try. Her guns trained and fired at a number of targets.
U.S. operations
terminated at 0226, when Captain Hoover, senior surviving officer, on Helena,
ordered all ships to retire to the east. At the same time, Japanese ships
that did not yet head west, north, or northwest, were making that move.
Admiral Abe's formation had not come out unscratched: numerous shells had
scored on the Hiei, igniting fierce fires in her superstructure
and flooding her steering room. Destroyer Yudachi, hit severely
by shells probably from Aaron Ward and Juneau, lay dead in
the water; destroyer Akatsuki was destroyed early in the action
by heavy gunfire. Other destroyers were lightly damaged.
Abe's
confidence was shaken; his chief of staff had been killed besides him by
machine-gun fire from Laffey; his flagship was burning, with little
chance of improving the situation during the night. Accordingly, he ordered
a withdrawal. For all their losses, the U.S. had saved Henderson Field
once more.
Epilogue
The battle
was over; but neither force would be spared further losses and bloodshed.
As the sun crept slowly over the eastern horizon, both sides retired their
forces, more or less speedily.
Atlanta, Portland,
and Aaron Ward were still drifting or circling around in the sound.
Hiei was moving slowly toward the Slot, being tended to by light
cruiser Nagara. A tug came to aid the U.S. ships, and tow them into
the sanctuary of Tulagi. Her first target was Portland, but Captain
DuBose ordered the small vessel to attach itself to Atlanta. It
was no use: the light cruiser was in no condition to be saved, and after
the tug had taken the survivors off, the light cruiser was left to die.
Heavy
cruiser Portland, however, could be saved, and the tug towed the
ship into Tulagi, where she anchored at 0108 on 14 November. Before, she
had sunk the Yudachi, still swimming, with accurate 203mm gunfire.
Aaron Ward, with the tug's help, reached Tulagi at 0800 on 13 November,
having been under intermittent fire of the battle's soon-to-be largest
victim, Hiei.
The new
dawn saw airplanes being readied frantically at Henderson Field to pursue
the fleeing enemy, and Marine dive bomber squadrons were astonished to
find a victim such as Hiei so close. She had suffered underwater
damage to her steering gear, which flooded, preventing a swift escape.
Aircraft attacked frequently and effectively in preventing the battleship's
men from concentrating their efforts. At 1015, TBFs from Enterprise,
launched by Rear-Admiral Kinkaid to supplement the Marines at Henderson,
attacked the damaged battlewagon, and throughout the next four hours the
intensity of air attacks increased. Abe had hoped to move Kirishima
back under cover of darkness to tow Hiei, but abandoned his efforts
to save the ship, ordering her abandoned and scuttled. Admiral Yamamoto
cancelled the scuttling order, instead wanting to retain her as a decoy.
But Hiei did not accept this honor bestowed upon her, as she foundered
during the next night. Abe retired northward, meeting Admiral Kondo's battleships
north of the Solomons.
The last
loss of the battle was also one of the most shocking examples of the deadliness
of the calm, blue expanses of the Pacific Ocean. Captain Hoovers force,
Helena, San Francisco, Sterett, O'Bannon and
Juneau were retiring slowly to Espiritu Santu, but not all would
make it.
A Japanese
submarine, aiming at San Francisco but failing to hit her because
of overestimating her speed, scored instead on the hapless Juneau.
Immediately, a huge pillar of smoke rose, the ship disintegrating beneath
it. Captain Hoover continued on, not wishing to risk his ships by lingering
around and expecting no survivors anyway below this cauldron of fire, but
he was wrong. About 100 men had survived the dIsaster -- yet the failure
of air searches to find them cost the majority their lives. Only ten men
eventually survived the ordeal of sharks, missing food and water, and heat.
With Juneau, 683 men, including Captain Swenson and the five Sullivan
brothers, died.
Conclusion
Callaghan's
dismal performance can not be explained; we do not know what plans the
late Admiral prepared for this battle, nor how far they were executed.
We do know that Admiral Abe's deeds were not particularly helpful to his
cause. His fighting formation was unjustifiably difficult, and he paid
the price in not knowing where his ships were. He had little chance to
execute command functions because his own flagship was badly mauled.
Callaghan's
problems were similiar, but his confusion was more obvious during the heat
of the battle. His initial delay in ordering the opening of fire is hardly
forgiveable. His open fire order, "Odd ships fire starboard, even ships
fire to port", was sound, for Callaghan didn't know where the enemy was
and needed a quick spreading of fire. His next orders "We want the big
ones! Get the big ones first!" were born out of the heat of battle, and
had little influence. His order to cease fire in the middle of action,
probably only directed to the San Francisco, which was mistakenly
firing on Atlanta, caused further confusion, but how it was wrongly
transmitted is unclear and cannot be blamed on him unless further study
is made. He did not attempt to execute maneuvers with his ships other than
those his captains ordered.
However,
it must be admitted that Callaghan's maneuvers led to the abandonment of
the bombardment effort, and resulted in the destruction of Hiei,
and that his effort was never characterised by a desire not to risk his
ships. The battle in its form probably was the only way to stop the Japanese,
disrupting their formation and providing, with close-range 203mm fire,
the only way to pierce the battleships' armor. A heavy price had been paid;
but the victory was Callaghan's.
|
Japanese
Forces
|
United
States Forces |
Bombardment Force,
Volunteer Attack Force
(Adm. Abe)
BB Hiei (Flag)
BB Kirishima
CL Nagara
13 Destroyers |
TG 67.4
(Adm. Callaghan)
CA San Francisco
(Flag)
CA Portland
CL Helena
CL Atlanta
CL Juneau
8 Destroyers |
Notes
1: Callaghan
was promoted several weeks earlier than Scott to Rear-Admiral, and thus
senior, but he had not commanded ships at sea for two years, and had not
seen any action besides an air attack on November 12th.
2: Abe knew
of the reinforcement convoy, but had not heard anything else and was sure
the ships had retired.
3: Callaghan
meant the ships' position in the column, i.e. the lead ship, as number
one, would fire to starbord, the second to port, and so on.